NP00G PROTOCOL CONVERTER
Unofficial, work-in-progress, check for updates.
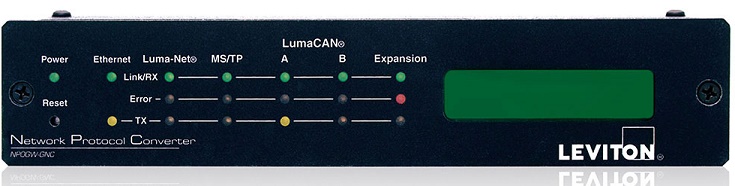
NP00G GATEWAY / PROTOCOL CONVERTER
This document will assist in the installation of protocol conversion firmware and connection of the Gateway to ethernet.
Online Documentation:
Conversions Available Now:
- LumaCAN3 to Luma-Net (LC3-LN.zip)
- LumaCAN2 to Luma-Net (LC2-LN.zip)
- DMX to LumaCAN3 (DMX In to LC3.zip)
- DMX to Luma-net (NP00G DMX In to LN.zip)
- LumaCAN2 to LumaCAN3 (LC2-LC3.zip) (note: no config.cfg file yet)
- LumaCAN3 to DMX Out (LC3-DMX.zip)
- Luma-net to DMX Out (LN-DMX.zip)
Future?
Expert Short Version
- Go to Leviton FTP . Navigate to Product\NP00G folder.
- Copy the appropriate zip file for your conversion to your local drive.
- Extract the zip file.
- Review the config.cfg file. Edit the file for DHCP or Static IP.
If converting to or from DMX, see additional instructions below.
- Copy files back to the Gateway's SD Card.
- Install the SD Card and boot the Gateway.
- Observe the LCD for success or failure. Review failure causes and cures in manual.
Detailed Explanation
The demonstration below uses the "LC3-LN" firmware (LumaCAN3 to Luma-Net) to illustrate.
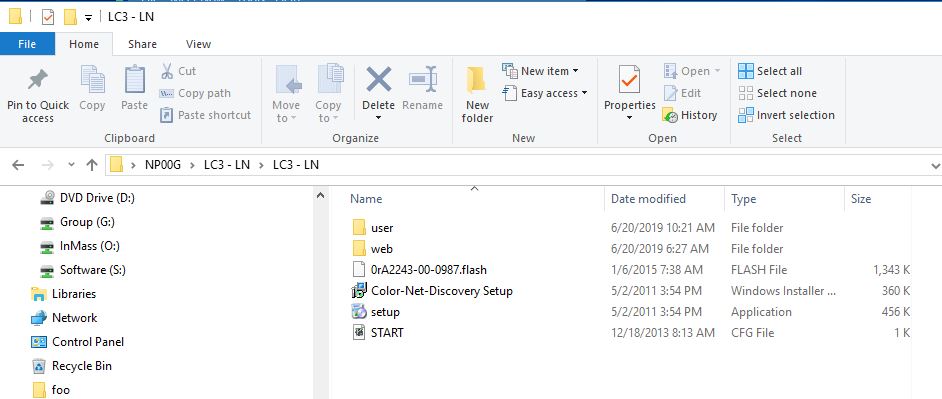
Go to Leviton FTP . Navigate to Product\NP00G folder. Find the appropriate conversion zip file (in this case LC3-LN.zip), and copy it to your local machine. Extract the zip file. Be sure the results of your extraction look like this: (NOTE: The .flash filename will be different if using a different protocol conversion!)
Open the user Folder. Make a backup of the existing config.cfg text file that resides there. (Note: by default, Windows will not show the .cfg extension in the file name.)

Open the config.cfg file with a decent text editor. To enable DHCP, set app.config.DHCPenabled to "1". Your network parameters can be as minimal as this to enable DHCP on the first boot:
app.config.DHCPenabled = "1";
app.config.IPaddress = "";
app.config.IPmask = "";
app.config.IPgateway = "";
Any data entered into the other three network-related parameters will be ignored and greyed out on the web browser interface. If left blank, as in the example above, IP Address, Subnet Mask, and Default Gateway will show as 'undefined'.
For static IP, be sure app.config.DHCPenabled="0". Enter the remaining information as instructed by local IT.
Once you have the networking set up, you can do all further configuration changes in the graphic browser interface (see below). However, you may manually map your channels in config.cfg as well, using this format:
Router1.config.ChannelPatch.Patch[1]="Input_Protocol_Start, Output_Protocol_Start, #_of_sequential_addresses_reserved, Input_Protocol, Output_Protocol.
See the box below for an example.
Special Instructions for Conversions to/from DMX
Settings that must be utilized when using ANY DMX protocol on NP00G:
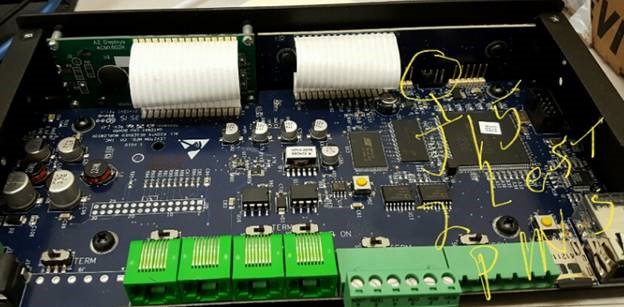
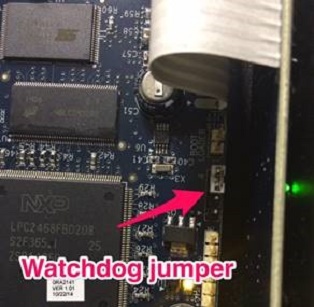
- Disable hardware watchdog timer.
- Place jumper across pins 3 and 4 of J15 to disable watchdog timer.
- Disable software watchdog timer.
- Watchdog timer can only be disabled by manually editing the config.cfg file.
- The watchdog timer setting is not present in the configuration web interface.
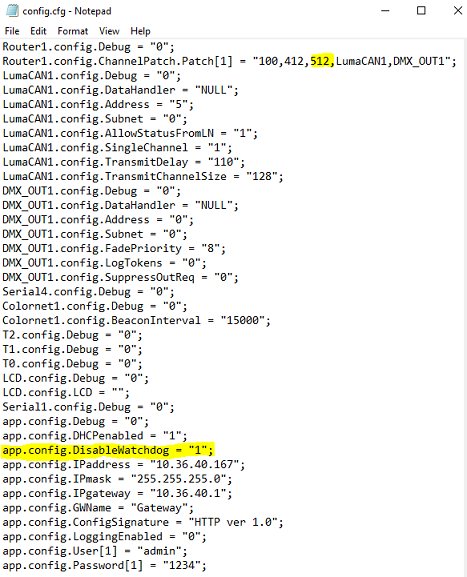
app.config.DisableWatchdog = "1";
- Ensure that # of DMX channels in config.cfg is set to 512.
- Value can be set in the file manually or through the configuration web interface
Router1.config.ChannelPatch.Patch[1] = "1,1,512,LumaCAN1,DMX_OUT1"
- Check to make sure all ports are appropriately terminated.
Save the file.
Be sure Gateway is powered off. Remove the SD Card, and, using a USB adapter, insert it into a PC.
You may wish to save any current files on the SD to your local drive for backup. Otherwise, delete all files from the SD completely. Then, copy the folders and files you pulled from Leviton FTP, including your updated config.cfg file, to the clean SD Card. The resulting file list should look exactly as in the image above. Navigate to the user folder to be sure the updated config.cfg is there.
Replace the SD Card into the Gateway, and be sure the Gateway is connected via ethernet. Apply LumaCAN power. Once the IP address is displayed on the LCD, enter that address into a browser as a URL, unless an error condition is detected. Troubleshooting is described in the manual and via intranet technical articles. Otherwise, in about a minute, the configuration will show on screen. Now, changes to channel assignments and network settings can be readjusted via the browser interface. Click the "Save Changes" button, and the edits will be saved to the SD Card.
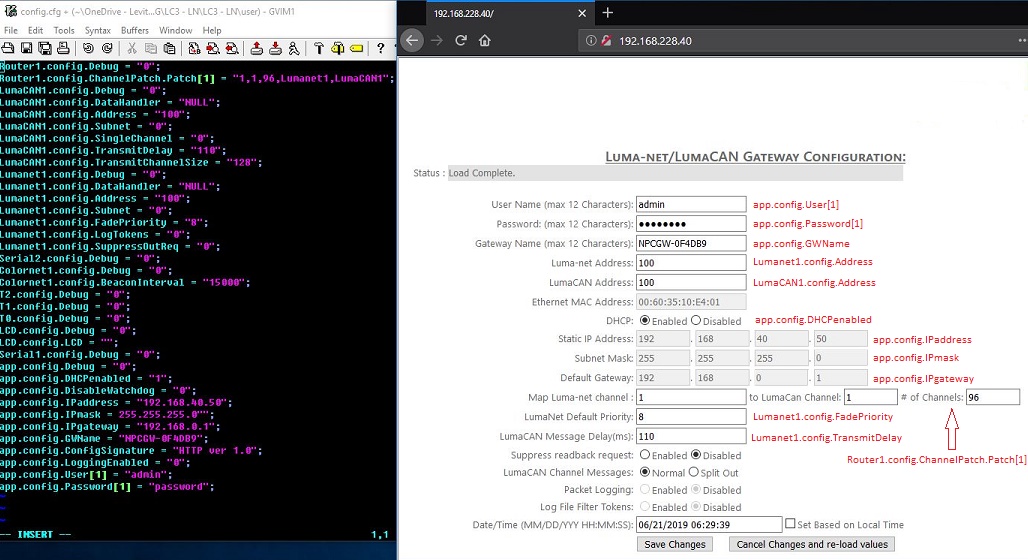
config.cfg text vs. Browser Interface cross-reference:
Below is a cross reference between the config.cfg and the browser interface. Note how "default" static IP information has been entered in config.cfg, but it is greyed out in the browser view (and therefore ignored) because DHCP is set to "1" in config.cfg. Also note that the Watchdog cannot be enabled or disabled from this screen.
Here is a properly configured LumaCAN to DMX with DHCP:
dhopkins@leviton.com 16-Aug-2019